台湾のMr.KさんからDIYメンテナンスレポートをいただいた。彼もE34
525iのオーナーである。今回のレポートは、ドアフレームに付いているウェザーストリップの交換だ。
I received a DIY maintenance report from Mr.K in Taiwan, who is also an
owner (enthusiast?) of E34 525i. His report is about the renewal of weather
strips, which are attached on the door frames.
それでは、早速、紹介しよう。
Anyway, let me start introducing the report.
E34は比較的古い車なので、ウェザーストリップが写真1のように劣化していることが多い。これが劣化すると、雨漏りすることもあるようだ。
E34 is relatively old car, so that the weather strips might be tired as
shown in Picture 1. If it is tired, rain might leak in the car.

写真1 劣化したウェザーストリップ
Picture 1 Tired weather strips
もちろん、これを新しいものに交換することもできるのだが、非常に高くついてしまう。Mr.KさんはE39のウェザーストリップを流用した。E39のウェザーストリップなら、解体車から外してくれば安上がりだし、少なくともE34のものよりは新しい。なかなかチャレンジャーである(笑)。
Of course, you can exchange them into the new ones. But it costs too
much. Mr.K tried to apply the weather strip of E39 to E34. Because
the weather strip of E39 can be obtained from the scrap cars with less
expensive cost, and they are relatively new, at least newer that that of
E34. Mr.K must be a challenger :-).
写真2にMr.Kさんが手に入れたE39のウェザーストリップを示す。
Picture 2 shows the weather strip of E39, which Mr.K got.
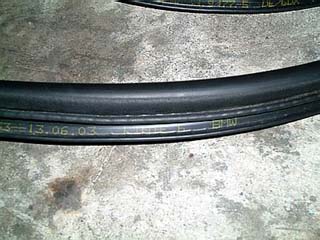
写真2 E39のウェザーストリップ
Picture 2 Weather strip of E39
写真3に示すように、E39とE34のウェザーストリップの断面は非常に似ている。っていうか、ほとんど同じだ。
As shown in Picture 3, the cross section of the weather strips for both E39
and E34 is very similar, almost the same.

写真3 E39(左)とE34(右)のウェザーストリップの断面
Picture 3 Cross sections of weather strips for E39(left) and E34(right)
もちろん、写真4のように外観もよく似ている。
Of course, the outlooks of the both are also similar as shown in Picture 4.

写真4 E39(左)とE34(右)のウェザーストリップの比較
Picture 4 Comparison of weather strip for E39(left) and E34(right)
さて、ここで交換方法を紹介しよう。
Anyway, let me introduce the exchange procedure.
まず、写真5のようにフロントドアのエントランスカバーを外す。
First, the entrance strip covers of the front doors should be removed as
shown in Picture 5.
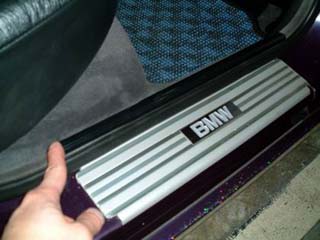
写真5 フロント側のエントランスカバーを外す
Picture 5 Removal of entrance strip cover in front door.
エントランスカバーの裏側には、3本のプラスチックピンがついており、写真6のようにこれを小さなドライバーで外す。
There are three plastic pins on the backside of the strip cover, and remove
the most front pin by using a small screw driver as shown in Picture 6.
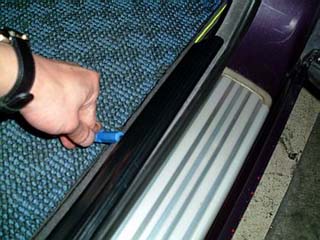
写真6 プラスチックピンを外す
Picture 6 Removal of plastic pins.
そして、写真7のようにエントランスカバーを前方にずらす。
Then slide out the strip cover forward as shown in Picture 7.
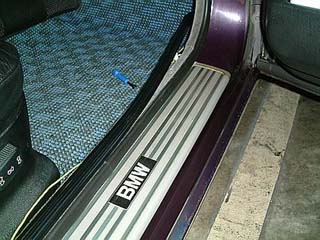
写真7 エントランスカバーをずらす
Picture 7 Slide out strip cover.
写真8はエントランスカバーの裏側である。裏側に3本のピンのうちの2本が見えるだろう。もう1本は車両側に残っている。
Picture 8 shows the backside of the strip cover for front door. In
Picture 8, two white pins out of three can be seen on the backside, while
another pin is remaining on the car frame.
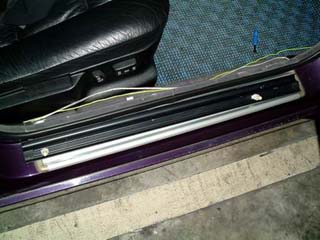
写真8 エントランスカバーの裏側
Picture 8 Backside of strip cover.
リアのエントランスカバーの外し方はフロントの場合とほとんど同じである。写真9にリアのエントランスカバーを外したところを示す。
The removal procedure of the rear strip cover is almost the same as that of
the front. Picture 9 shows the removed rear strip cover.
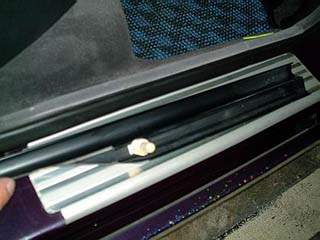
写真9 リアのエントランスカバー
Picture 9 Rear strip cover.
さて、ここまで来ると、手でウェザーストリップを外すことができる。少々固いかもしれないが。
Now, you can pull off the weather strip by your hands. It might be a
little bit tight.
古いウェザーストリップを外した後、新しい(?)E39のウェザーストリップを装着する。しかし、E39のウェザーストリップはE34のものより少し長い。そこで、写真10のようにウェザーストリップを切断する。
After removal of the old weather strip, install the new(?) weather strip of
E39. But, actually the weather strip of E39 is a little bit longer than
that of E34, so that you have to cut it as shown in Picture 10.
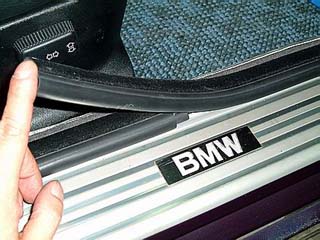
写真10 長いE39のウェザーストリップ
Picture 10 Weather strip of E39 is longer.
ウェザーストリップを切断するときは、写真10のようにゴムの芯を少し残すようにする。左側のウェザーストリップの端に少しゴムの芯が残っているのがわかるだろう。
When you cut the weather strip, you should remain the rubber core as shown
in Picture 10. You can see the short rubber stick at the edge of the
left weather strip.
そして、写真11のようにウェザーストリップの長さを調整して切断する。
Then, Picture 11 shows the shortening of the weather strip to adjust the
length.
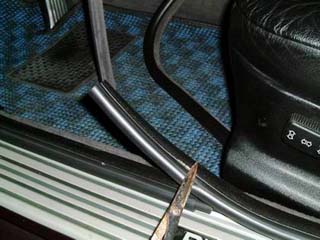
写真11 ウェザーストリップの切断
Picture 11 Shorten the weather strip.
切断面は写真12のようになっている。
The cross section of the cut is shown in Picture 12.
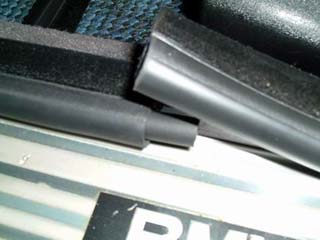
写真12 切断面
Picture 12 Cross section after cut
そして、写真13のようにゴムの芯で両端を繋ぐ。
Then connect the both edges with the rubber stick as shown in Picture 13.
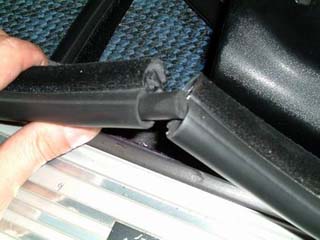
写真13 ゴムの芯で繋ぐ
Picture 13 Connection with rubber stick.
写真14に繋いだところを示す。
Picture 14 shows the connection.
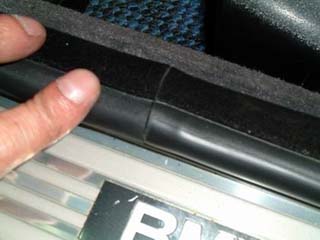
写真14 繋いだところ
Picture 14 Connection
新しい(?)ウェザーストリップを装着後、エントランスカバーを元に戻す。元に戻す手順は、取り外しと逆順だ。
After the installation of the new(?) weather strips, install the entrance
strip covers. The procedure of the installation is the reverse of the
removal.
写真15に新しくしたウェザーストリップを示す。古いものを比べると弾力がありそうなのがわかるだろう。これで、雨漏りも心配ない(と思いたい?)。
Picture 15 shows the weather strips after the renewal. Comparing with
the old one, it looks elastic. No rain must be leaked (I hope?).
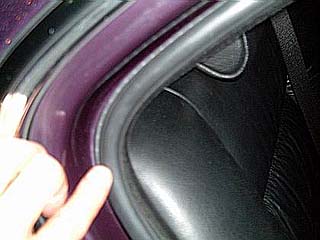
写真15 新しいウェザーストリップ
Picture 15 New weather strip.
写真16〜20に新しいウェザーストリップを示す。
Picture 16 to 20 shows the outlook of new weather strips.
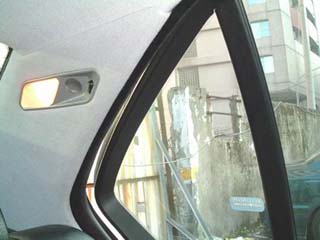
写真16
Picture 16
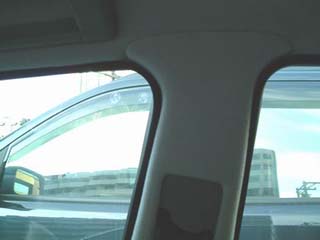
写真17
Picture 17
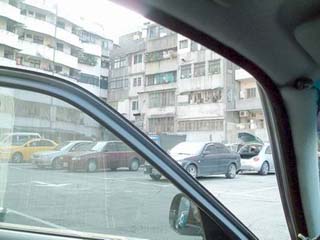
写真18
Picture 18
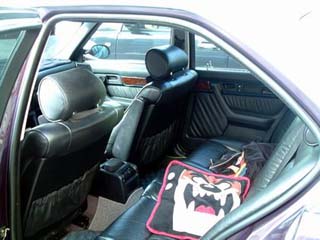
写真19
Picture 19
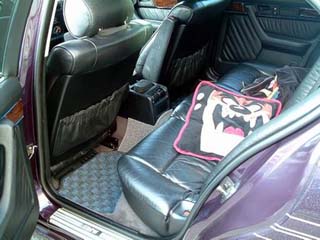
写真20
Picture 20
Mr.Kさんによると、E39の解体車からウェザーストリップを手に入れた場合、新品のE34のものに比べて、1/4〜1/5の費用で済むようだ。
According to Mr.K, the cost of used weather strips for E39 is one-forth or
one-fifth of the new weather strips for E34, if you get them from the scrap
E39
さて、ここでMr.Kさんの車を写真21に紹介しよう。
Here, I will introduce Mr.K's car as shown in Picture 21.
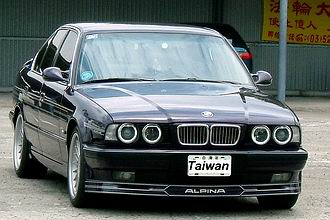
写真21 Mr.Kさんの車
Picture 21 Mr.K's car
格好いい! 外観の改造点は、イカリング、ホワイトウィンカー、アルピナフロントスカート、M5ミラー、アルピナホイール、ローダウン等だ。
It's very COOL! The modifications of exteriors are angel rings, white
turn lights, alpina front skirt, M5 look door mirrors, alpina tire wheels, low
down suspensions, and more...
写真22の数字の部分は、内装の改造点だ。
And, You can see the number in Picture 22, which are Mr.K's modifications
of interiors from the original parts.
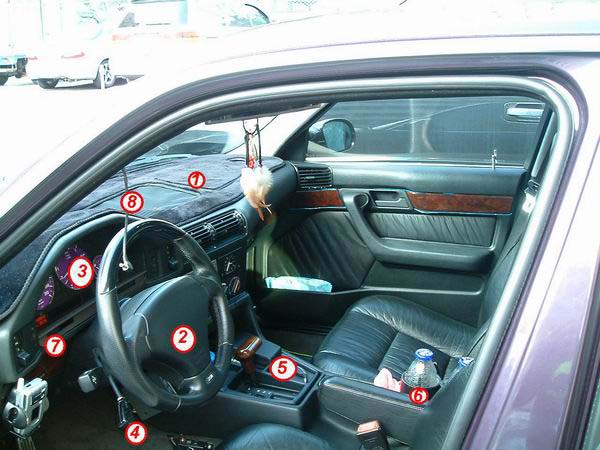
写真22 Mr.Kさんの車の改造点
Picture 22 Changes from original parts in Mr.K's car.
末尾ではあるが、DIYレポートをいただいたチャレンジャーのMr.Kさんに感謝する。
In the end of this page, I greatly appreciate Mr.K's challenging spirit and
his DIY maintenance report. Thanks!